Roguelike defense game guide
Best Grow Guerrilla Builds: Skills, Relics and Synergies That Work
How drafting really works in Grow Guerrilla, which guns suit which builds, the relic and skill combos that break runs open, and the anti-synergies to avoid.
A Grow Guerrilla run lives or dies on its build: the gun you bring, the 55 skills Jah might offer you, and the 18 relics (Jah's Blessings) that bend the rules. This guide explains how the draft and shop actually pick what you see, which combinations multiply each other, and which ones quietly cancel out. Then it puts it together into four builds you can aim for.
How the draft and shop pick your options
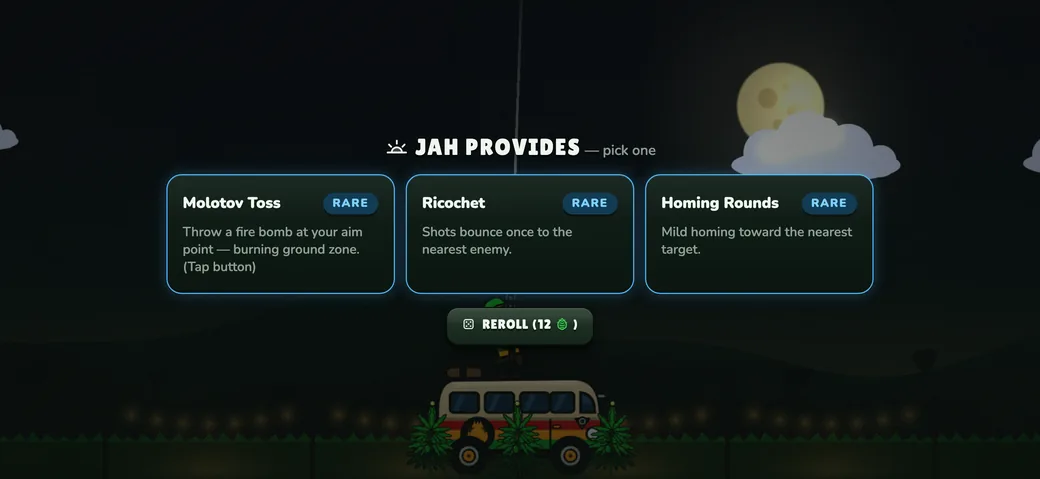
After every cleared stage you pick one of three skills (four with the Wide Selection upgrade or the Ganja Guru relic). Cards are weighted by rarity: each common is about twice as likely as each rare, and each epic starts roughly eight times less likely than a common, with the epic weight creeping up every stage. In practice, epics make up only about 4–12% of draft cards depending on the stage and how many you've unlocked.
Jah's Shop works differently. It offers two skills, one relic, a heal or replant, and sometimes a weapon battery — and it picks skills without rarity weighting. That makes epics fill roughly 17–28% of shop skill slots, two to four times their share of draft cards. If you're hunting a build-defining epic, the shop is where you're most likely to find it.
- Tiered skills come back. Hot Lead, Critical Buds, Cooling Fins, Fertile Soil and others can be drafted again to stack, up to their tier cap.
- Active skills take slots. You can hold two actives (three with the Third Hand upgrade); once full, new actives stop appearing.
- Rerolls cost 12 buds (cheaper with Smooth Talker). Lucky Roll gives a free reroll every stage, and Fresh Eyes gives free rerolls each run.
- Unlocking widens the pool — and dilutes it. Every skill you unlock in the Grow House is one more card competing for each slot. Unlock the epics you want to see, not everything at once.
Choose the gun first
Your weapon decides which skills are good. Base damage per second rises with every unlock, so a newer gun is a genuine upgrade — but the bigger difference is how each one handles heat. Fast guns heat continuously and jam quickly when held; slow, heavy guns get a long gap after every shot and cool during it.
| Gun | Unlock | Style | Held fire at base stats |
|---|---|---|---|
| AA Machine Gun | Starter | All-round stream | Jams after ~9 s |
| Spread Shotgun | Lv 2 | Six-pellet cone, short range | ~18 s |
| Water Cannon | Lv 3 | Heavy knockback, puts out fires | ~5 s |
| Seed Mortar | Lv 4 | Arcing splash | Cools between shots |
| Babylon Shredder | Lv 5 | Six-barrel suppression | ~3 s |
| Bee-Drone Launcher | Lv 6 | Homing swarm | ~3 s |
| Chalice Flamer | Lv 7 | Burning fire cone | ~3.5 s |
| Flak Cannon | Lv 8 | Airbursts at the aimed altitude | ~13 s |
| Frost Bong | Lv 9 | Chilling rounds | ~4 s |
| Dual Uzis | Lv 10 | Two diverging streams | ~2 s |
| Skunk Bomber | Lv 12 | Lingering poison clouds | Cools between shots |
| Sativa Sniper | Lv 15 | Huge piercing shots | Cools between shots |
| Machete Boomerang | Lv 17 | Piercing blade that returns | Cools between shots |
| Bong Rocket | Lv 19 | Slow rocket, huge splash | Cools between shots |
| Prism Arc | Lv 21 | Chain lightning | ~9.5 s |
| Budzooka, Irie Vortex, Zion Railgun | Store purchase | Cluster airburst, pulling orb, sky-piercing rail | Cool between shots |
"Unlock" is the Farmer Level required before you can buy the gun with Gold Bud in the Armory. Times are for a cold barrel with no upgrades or skills. Any fire-rate bonus shrinks the gap after each shot, so a "cools between shots" gun can start jamming once you stack Rapid Fire or play Sativa Haze. Armory levels work the other way, trimming heat per shot. Piercing shots lose power with each enemy they pass through, so a line-up is a bonus, not a screen wipe.
Heat builds: three ways to stop jamming
Gun heat is the constraint most builds are fighting. There are three distinct answers, and they don't all stack.
- More headroom. Cooling Fins (+25% heat capacity per tier, up to three tiers), Quick Vent (cools twice as fast and halves jam time), plus the Big Radiator, Chrome Barrel and Gun Oil perks. Reliable, works with everything.
- Free shots. The One Love relic makes every 4th shot cost no heat and deal double damage — effectively a quarter less heat and a quarter more damage. Great on heavy guns.
- Rule-breakers. Trenchtown Rock means the gun can never overheat, at −10% fire rate. Dreadlock Coil turns an overheat into a +35% damage buff for three seconds and drops the gauge to 60% instead of jamming. On fast guns, Coil means you hit the cap every couple of seconds and spend most of the fight buffed.
Anti-synergy: don't take Trenchtown Rock and Dreadlock Coil together. Trenchtown stops the gauge just short of full, so the Coil's buff never triggers. Pick one.
Trigger Discipline is a different kind of heat skill: the first shot after a pause of just over a second deals triple damage. It rewards a lift-and-fire rhythm with slow, heavy guns, and pairs well with Auto-Loader, which makes the first shot of every trigger pull come out instantly.
Relics worth building around
You get a guaranteed relic for clearing each elite stage (4 and 8) and for killing the boss, plus whatever you buy in the shop. Seven of the 18 must be unlocked in the Grow House first. The ones that most often change how a run plays:
| Relic | Effect | Best with |
|---|---|---|
| One Love | Every 4th shot is free and doubled | Heavy guns, Trigger Discipline |
| Dreadlock Coil | Overheat buffs damage instead of jamming | Fast guns, fire-rate stacking |
| Trenchtown Rock | Never overheat, −10% fire rate | Fast guns without heat skills |
| Sensimilla Seeds | Grow an extra plant now (max 5) | Indica's Heavy Harvest |
| Second Wind | First plant destroyed each stage instantly replants | Hybrid's Momentum, any risky build |
| Irie Vibes | Perfect stage shields your plants next stage | Perfect Momentum |
| Contact High | Kills close together trigger a small blast | Swarm guns, Chain Reaction |
| Ganja Guru | Drafts show four choices | Hunting a specific synergy |
| Higher Ground | +25% damage to enemies in the top third | Long-range guns that kill early |
Synergies and build-defining epics
Three epics only appear for their strain: Full Auto Sensi+ (Sativa), Heavy Harvest+ (Indica) and Perfect Momentum (Hybrid). Our strains guide covers the numbers. By our math you'll be offered your strain's synergy in roughly one season out of three, counting drafts and shops — so treat it as a jackpot, not a plan.
The other build-defining epics, all unlocked in the Grow House:
- Chain Reaction: explosions can set off other explosions. Feed it splash — Seed Mortar, Flak Cannon, Bong Rocket, Explosive Tips, Contact High.
- Glass Cannon: +60% damage, but every plant drops to 1 HP. Viable only with strong plant denial (Tarp Shield, Irie Vibes, Second Wind); never on CBD Medic.
- Pacifist Patch: your gun is disabled and four strong auto-turrets deploy. Gun-only skills disappear from the pool, so drafts fill with defense, economy and actives.
- Green Overwhelm: a permanent helper drone for every 50 kills. Best with swarm guns that rack up kills.
- Bloodlust and Runaway Barrel: stacking damage per kill, and fire rate that climbs the longer you hold the trigger. Both reward fast guns that never stop shooting — which means heat control.
Actives, and what scales
Some effects deal fixed damage that ignores your upgrades and the stage's HEAT: Jah Lightning (a single 120-damage bolt), Firework Barrage, Molotov Toss (a burning patch that only hurts ground units), Incendiary burn, Contact Poison and Purple Haze's trail. They're excellent early and in Chapter 1, and fade as enemy health climbs in later chapters.
Utility actives never fall off: Airhorn stuns everything on screen for about 1.6 seconds (and breaks abduction beams), Time Warp slows enemies to about a third speed for three seconds, and Rewind replants your last lost plant. If you only have two active slots, these are usually the better long-term picks.

Four builds to aim for
Coil Shredder (fast gun, any strain)
Babylon Shredder or Dual Uzis, Dreadlock Coil, then fire rate and damage: Rapid Fire, Hot Lead, Bloodlust. With the Coil, overheating is your damage buff, so you never let go. Add Homing Rounds on Sativa to keep the streak.
Rooted Indica (plants are damage)
Indica Kush with a heavy gun (Flak Cannon or Seed Mortar). Draft Fertile Soil, Greenhouse Glass and Tarp Shield; grab Sensimilla Seeds and Second Wind. Every plant alive is +12% damage (+20% with Heavy Harvest+).
Momentum Hybrid (kill to grow)
Hybrid Diesel with a swarm gun (Chalice Flamer, Prism Arc). Heat skills first, because Momentum adds fire rate. Second Wind protects the stack; Airhorn and Tarp Shield stop the plant hits that would reset Perfect Momentum.
Chain Boom (splash everything)
Seed Mortar, Flak Cannon or Bong Rocket with Explosive Tips, Contact High and Chain Reaction. One Love doubles every 4th blast. Splash also handles the paratrooper drops that single-target guns struggle with.
Spending buds well
Buds are temporary, so spend them. Economy skills pay back slowly: Banker earns 10% interest on at most 50 unspent buds — never more than 5 buds a stage — so it rarely beats a damage or defense pick. Fat Stacks, Scavenger and Bulk Buyer (−20% shop prices) are better if you take them early. Shop prices also climb with every stage, so a relic you can afford at the first shop is cheaper than the same relic later. The one refresh per shop visit costs 10 buds and is worth it when the shop has nothing for your build.
New to the game? Start with the beginner's guide. Heading for stage 12? The bosses guide covers which of these builds handles each boss.
Frequently asked questions
What's the strongest build in Grow Guerrilla?
The highest ceilings come from multiplying stacks: a capped Hybrid Momentum with heat control, or Indica with five living plants and Heavy Harvest+. In practice, the strongest build is the one that solves heat for the gun you brought.
What is a weapon battery in Jah's Shop?
Another gun you've unlocked, deployed beside the field as an auto-firing emplacement for the rest of the run. Your held gun doesn't change, and you can have up to two batteries.
Are the premium guns required?
No. The starter AA Machine Gun plus 14 more guns unlock with Gold Bud as you level up; the Budzooka, Irie Vortex and Zion Railgun are optional store purchases. Details are on the Grow Guerrilla page.