Roguelike defense game guide
Grow Guerrilla Strains Guide: Which Strain Should You Play?
How all six Grow Guerrilla strains work — Sativa, Indica, Hybrid, CBD Medic, Purple Haze and Autoflower — with the numbers, best guns and skills for each.
In Grow Guerrilla your strain is the run's archetype. You pick one on the loadout screen next to your weapon, and it changes your base stats, adds a signature mechanic and, in two cases, unlocks an exclusive synergy skill in the draft. The in-game cards give you the headline; this guide gives you what the code actually does with it, so you can choose a strain on purpose instead of by color.
Quick answer if you're new: start with Sativa Haze (it's free), buy Indica Kush as soon as you reach Farmer Level 2, and save Hybrid Diesel for when you're confident at keeping every plant alive.
All six strains at a glance
| Strain | Unlock | Stat changes | Signature |
|---|---|---|---|
| Sativa Haze | Free | +30% fire rate, +10% crit; −15% damage, −10% plant HP | Full Auto Sensi: hit streaks ramp fire rate |
| Indica Kush | Farmer Lv 2, 100 Gold Bud | +25% damage, +25% plant HP, knockback; −20% fire rate, +25% heat per shot | Heavy Harvest: damage per living plant |
| Hybrid Diesel | Farmer Lv 4, 120 Gold Bud | Neutral | Momentum: every kill adds +1% |
| CBD Medic | Farmer Lv 6, 150 Gold Bud | −20% damage | Plants regenerate continuously |
| Purple Haze | Farmer Lv 8, 180 Gold Bud | −10% fire rate | Shots leave a damaging haze |
| Autoflower | Farmer Lv 10, 200 Gold Bud | +15% fire rate | An 8-stage season where everything is faster |
Strains are bought in the Grow House under Content. You can also try a locked strain for free: each Daily Challenge assigns a strain for the day, locked or not.
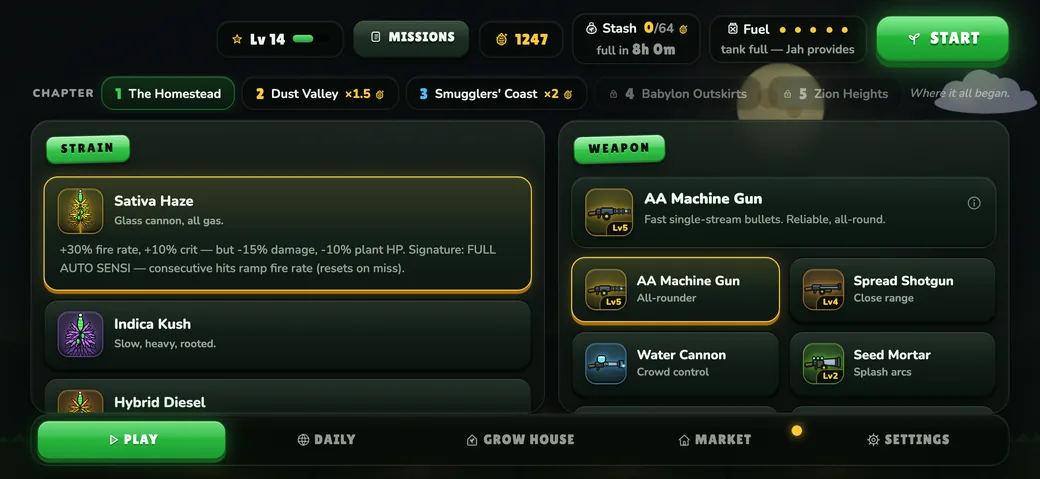
Sativa Haze: the glass cannon
Sativa trades raw damage for speed. On its own the stat line works out to roughly 16% more damage per second than a neutral strain (more shots and some crits, minus the damage penalty), but the real engine is Full Auto Sensi: every consecutive hit adds 1.5% fire rate, up to a 30-hit streak worth +45%. A single miss resets the streak to zero, and so does starting a new stage.
Two details matter. First, "miss" means a shot that leaves the screen or a bullet stream that fades out without hitting — so firing into empty sky between waves kills your streak. Second, piercing shots that pass through an enemy and then fly off-screen still count as a miss, which makes pierce builds an awkward fit.
- Best guns: accurate, fast streams — the AA Machine Gun, Babylon Shredder and Dual Uzis — or the homing Bee-Drone Launcher, which is very good at not missing.
- Draft for: Homing Rounds (keeps streaks alive), heat control (Cooling Fins, Quick Vent), and crit skills to build on the free 10% (Critical Buds, Killshot).
- Watch out for: heat. +30% fire rate means +30% heat per second before the streak even starts, and a full streak pushes it far higher. The Full Auto Sensi+ synergy (Sativa only) raises the ramp to 2.5% per hit, +75% at a full streak, which makes heat control mandatory.
Sativa tip: bosses are huge targets, so the streak is easy to max and keep. Stop firing between waves instead of sweeping empty sky.
Indica Kush: slow, heavy, rooted
Indica hits 25% harder but fires 20% slower, so its base damage per second is about the same as neutral. Its heat penalty is per shot and it fires less often, so heat per second also comes out about even — on fast and mid-speed guns the slower cadence can even leave more room to cool. What you actually gain is 25% tougher plants, extra knockback and Heavy Harvest: +12% damage for every living plant.
With three plants alive that's +36% damage; with five it's +60%. The Heavy Harvest+ synergy (Indica only) raises it to +20% per plant — +60% with three plants, double damage with a full field of five.
- Best guns: big hits that benefit from multipliers — Seed Mortar, Flak Cannon, Sativa Sniper — or the Water Cannon, whose heavy knockback stacks with Indica's to keep enemies pinned high.
- Draft for: anything that keeps plants alive or adds plants — Fertile Soil, Greenhouse Glass, Tarp Shield, and the Sensimilla Seeds and Second Wind relics. Every plant you save is damage.
- Watch out for: the downward spiral. Losing a plant cuts your damage, which makes the next plant easier to lose.
Hybrid Diesel: the snowball
Hybrid starts with no bonuses at all. Its signature, Momentum, adds +1% to both damage and fire rate for every kill, capped at +50%. Because both stats grow, a capped Hybrid deals about 2.25× the damage per second of a neutral strain. Momentum carries over between stages — it isn't reset at the start of a wave — but it's wiped the moment a plant is destroyed.
The Perfect Momentum synergy (Hybrid only) doubles the cap to +100% and stops plant losses from resetting it. The catch is easy to miss: instead, it resets the second time your plants take damage in a stage. Damage that's fully blocked doesn't count, so the tarp, the Irie Vibes shield and Greenhouse Glass (which shaves flat damage off every hit) become core pieces of a Perfect Momentum run.
- Best guns: anything that racks up kills — Babylon Shredder, Chalice Flamer, Prism Arc.
- Draft for: heat control (Momentum adds fire rate, and fire rate is heat) and plant protection. The Second Wind relic is excellent: its instant replant kicks in before Momentum is reset.
CBD Medic: the long defensive game
CBD Medic gives up 20% damage for plants that regenerate 1.6 HP per second, all the time. At 100 base HP, that's enough to bring a badly damaged plant back to full in about a minute, on top of the normal heal between stages. Chip damage from choppers, strafing jets and gas simply washes away.
- Best for: learning a new chapter, Dry Season stages (regen still works when the between-stage heal doesn't), and players who struggle with sustained pressure.
- Stacks with: the Green Thumb Idol relic, the Compost Bin perk and the Ital Medic crew member, all of which add more regeneration.
- Weak against: burst threats that regeneration can't outpace — tagged strikes, abduction beams, landed paratroopers — and the damage penalty makes boss fights longer. Avoid Glass Cannon, which sets every plant to 1 HP and makes regeneration pointless.
Purple Haze: damage that lingers
With Purple Haze, every shot leaves a purple trail. Roughly seven times a second, each bullet's haze deals a small fixed amount of damage to every enemy close to it. Two things follow from how that works:
- More and slower projectiles mean more haze. Fast-firing guns lay many trails, and slow projectiles such as Bee-Drone swarms spend longer in the air. Wide Choke (+1 projectile) and Split Shot add more trails.
- Haze damage doesn't scale. It ignores your damage upgrades and multipliers, so it's brutal against early paratroopers and swarms in Chapter 1 and a smaller share of your damage against the heavy health pools of later chapters.
Cloaked saucers aren't touched by the haze while they're invisible, so you still need direct hits for those.
Autoflower: the high-risk speedrun
Autoflower adds +15% fire rate, but enemies move 15% faster and spawn 15% faster, and the season is only 8 stages long. Those 8 stages are mapped onto the same 12-stage difficulty curve, so the game skips ahead: by your fifth stage you're already facing stage-8 difficulty.
That compression has costs beyond speed:
- Fewer drafts: 7 picks before the boss instead of 11.
- One guaranteed elite relic instead of two, because the curve jumps straight past stage 4.
- Four shops, same as usual, which makes buds relatively more valuable.
Play Autoflower when your Grow House investment can carry a thinner build: use your best-upgraded gun, and consider the Head Start perk (a free common skill each run) and Fresh Eyes rerolls. The win bonus is the same as a full season, so a confident Autoflower clear is a fast Gold Bud run.
How to choose for the situation
| Situation | Our pick | Why |
|---|---|---|
| First seasons | Sativa Haze | Free, fast and forgiving with a stream gun |
| Pushing a new chapter | CBD Medic or Indica Kush | Survival first; tougher plants or constant regen |
| Farming Gold Bud on a chapter you've beaten | Hybrid Diesel or Autoflower | Highest ceiling, or the fastest clear |
| Bosses | Sativa Haze or Indica Kush | Big targets keep streaks alive; living plants keep Heavy Harvest high |
| Swarm-heavy Chapter 1 runs | Purple Haze | Flat haze damage shreds low-health units |
Whatever you pick, the strain is only half the loadout. The skills and relics you draft decide whether a run takes off — see our builds and synergies guide for combinations that work with each strain, or start with the beginner's guide if heat and plants are still giving you trouble.
Frequently asked questions
Which strain is best in Grow Guerrilla?
There's no single best one. Hybrid Diesel has the highest damage ceiling once Momentum is capped, Indica Kush is the most consistent when you protect your plants, and CBD Medic is the safest while you learn. The right answer depends on the chapter and your build.
Do strain synergies show up in the draft automatically?
Only for the strain you're playing: Full Auto Sensi+ for Sativa, Heavy Harvest+ for Indica and Perfect Momentum for Hybrid. They're epic-rarity cards, so they won't appear every season.
Can I play a strain before buying it?
Yes. Daily Challenges assign a strain each day, including locked ones, so they double as a free trial. The Grow Guerrilla page has more on the modes.